Origami Butteryfly Diagrams

Well it’s been a busy week. We got the tiling and grouting done in our kitchen, so we’re over the hump on that job, and it’s looking really nice. Still have the sealing, caulking and some touch-up painting to do, but each of these tasks is small compared to the work so far. I’ll take some pictures of the completed project and blog about it in a future post.

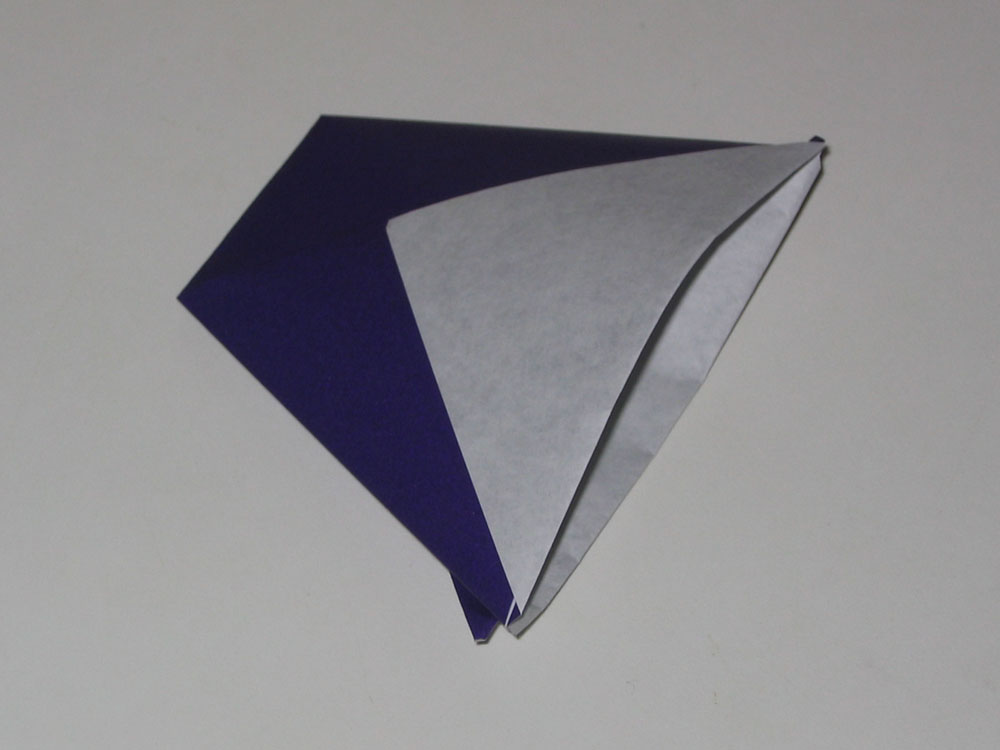
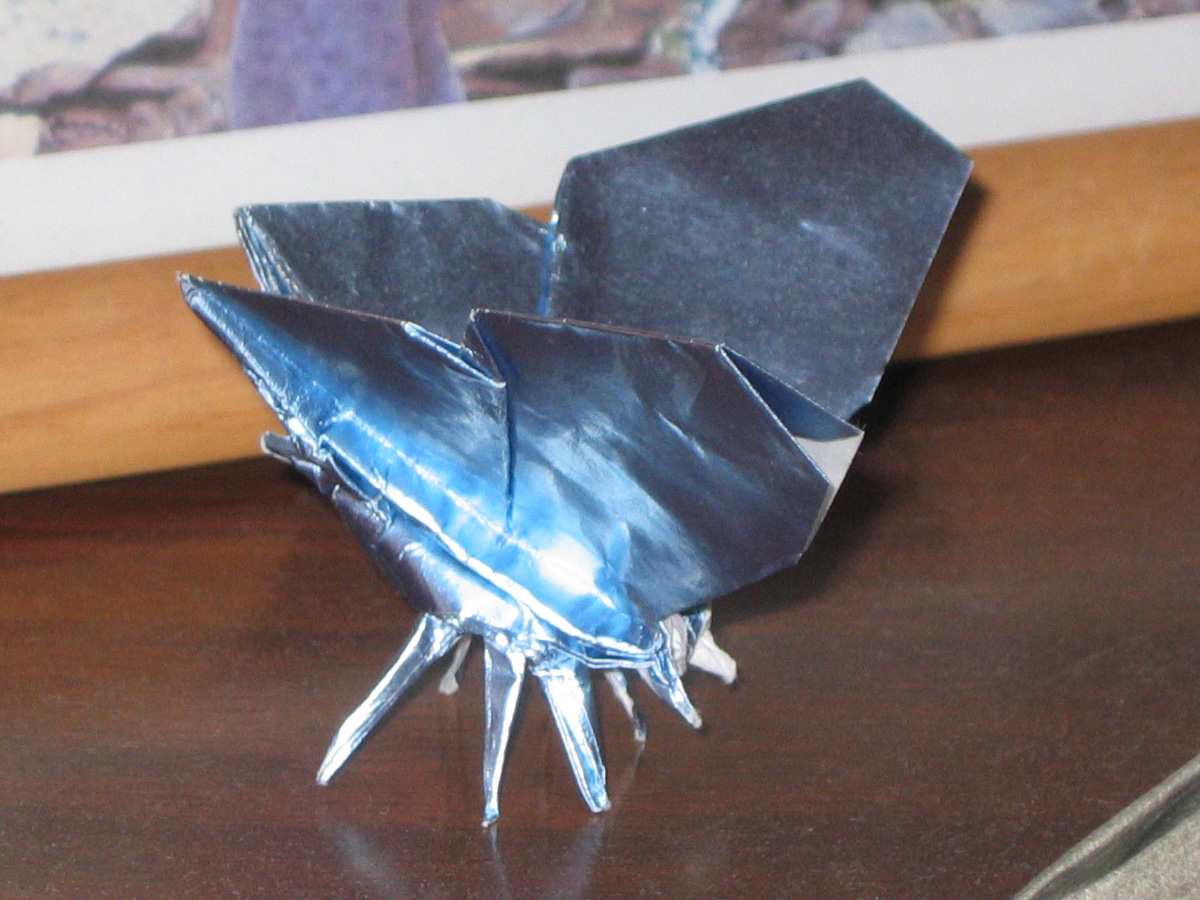
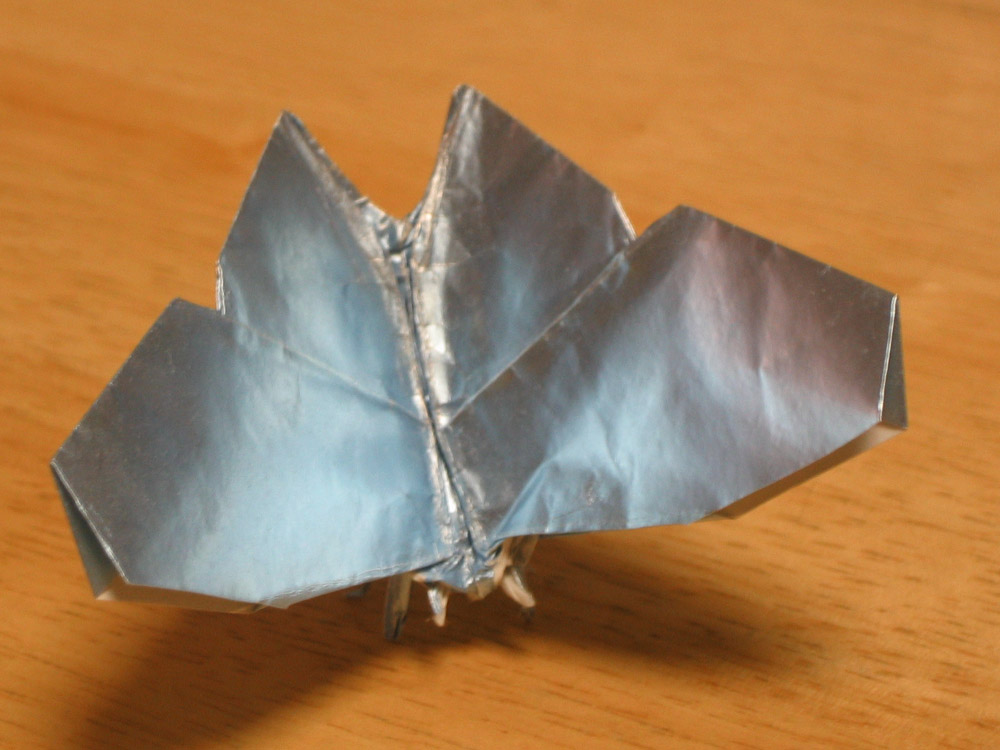
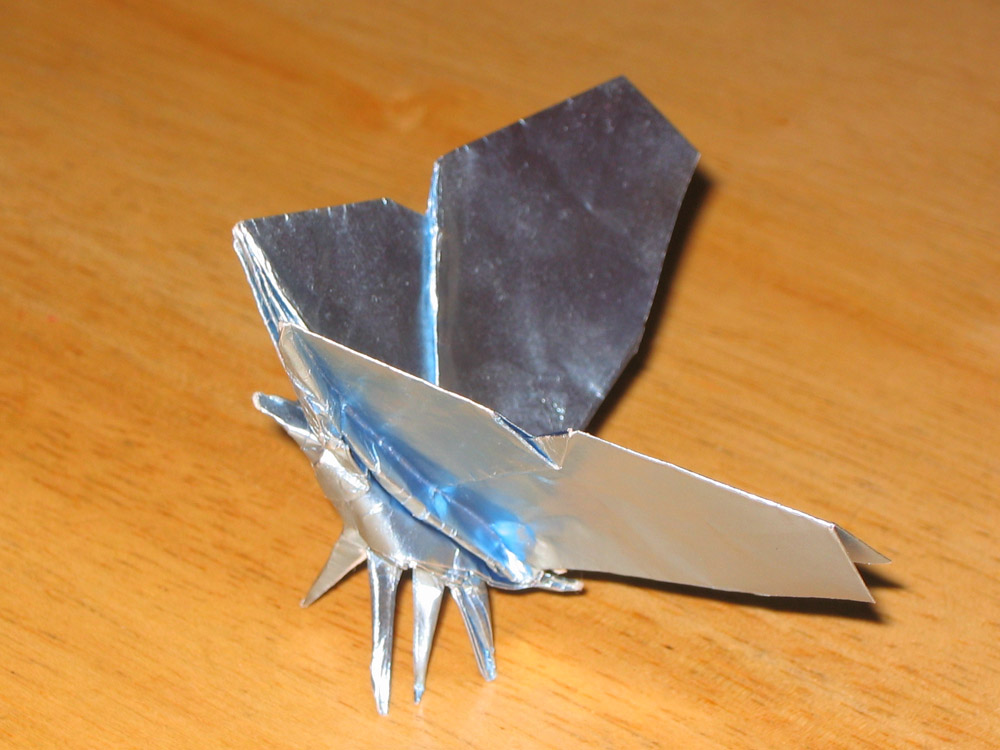
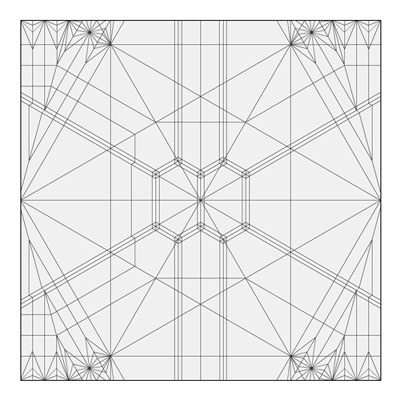
Meanwhile, the other bit thing is I finally completed diagramming my butterfly. I aim to do a full diagram of one original model a year. Because of the level of work involved, that’s about all I have time for, although I’ve been making more and CP’s of late. I blogged about this model previously, when I posted pictures of it. I mentioned at the time that I mainly developed it at last year’s OUSA. Well, I began diagramming it way back last summer, but then I got busy with work and put it aside for a while, and changed jobs around New Year, and so it took a while to get back to it.

And now here it is. I’d consider this an intermediate level model. I can make a nice looking one from a 6″ square, in about a half hour. The diagrams are only forty-something steps. It does have a rather advanced closed sink. People who don’t like closed sinks might like this one, cuz it doesn’t matter if you do a good job making the inside neat. I posted it online at:

http://www.zingman.com/origami/oriPics/butterfly/butterfly_diagram.swf

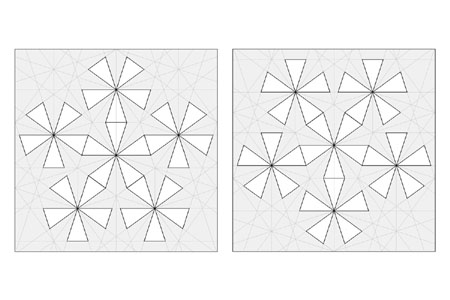
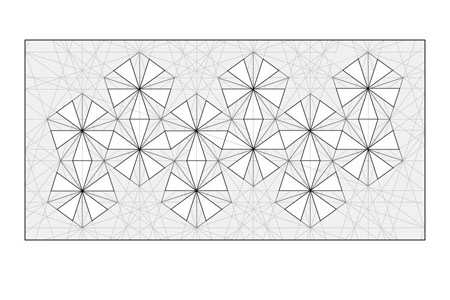
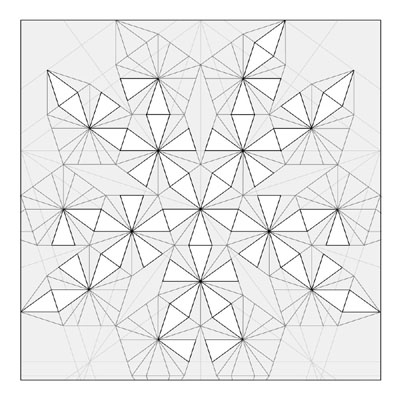
The diagrams are done in Flash, using (the current version of) my Foldinator tool. I’ve done a bunch of diagrams in Flash this way and it works pretty well for me. One of the things I like best is that the vector drawings scale up smoothly, so you can get a lot detail into the drawings and it won’t be lost. At some point I’m going improve the Foldinator to include a more generalized representation of the model, animations between frames, and eventually and authoring tool. But for now the next feature will probably be non-sequential access to the steps. In any event, the Foldinator project has taken a back burner for me of late, despite requests from the Origami community. Since I write software all day, and I’d rather spend my origami time making origami than writing more software. Now if I could get a grant or something, that might change the picture…

I submitted this model to this year’s OUSA Annual Collection, so if you want a printed version, look to see; it may appear in there.

Also, soon I will be updating my main origami page to include the Butterfly pics and diagrams, as well as other new models. I’m sort of waiting on that until I have a chance to take some nice pictures, set up with lights and all, rather than just the snapshots I’ve been posting here.

Origami By Children

Every year Origami USA sponsors an exhibit of Origami By Children. You can learn about it here. The deadline for submissions is fast approaching, so last weekend I was able to get my kids to sit down and focus on coming up with something. Lizzy, who is 7 now, started to take an interest in origami 2 years ago, when she invented her first original model, a picture frame.

Last year she did the traditional Lily. It’s more complicated than it looks, but the hardest move in is a squash fold, and she’s good at those. I coached her, showing her the model and encouraging her to take is slow and fold neatly. She did a nice enough job that her model got in the exhibition, and OUSA donated some origami books to her school.

This year she’s had more exposure to folding and knows how to follow diagrams, so I let her decide what to do. She folded a bunch of things out of John Montroll’s Christmas Origami, including the candle, bell, and candy cane. I guess no time of year is the wrong time to think about Christmas when you’re seven. She decided to do the ring from the Twelve Days of Christmas, and put five of them together. Of course it’s not a hard model technically — the folding style is know as “Pureland” meaning it’s only mountain and valley folds, but there’s some art to it in terms of color and composition. I think she did a nice job. I hope she gets in the show again.

Michelle, at three and a half, wants to do everything her big sister does, so she was along for the trip. I tried to teach her the bell, but the reverse fold just blew her mind, and 11 steps is about 4 too many for a 3-year-old to handle. So I scaled back and taught her the classic cup, on which the bell is based, which was just in her range.

Origami Butterfly

A fitting topic for the first day of spring. I had thought I might blog about something else tonight, since origami keeps coming up, and I have been doing other things too, honest. I could say plenty about my new job, but I think I’ll wait until a project goes live. Or I could talk about how I almost made it thru the winter without catching cold this year — until last weekend!

I could talk about my ongoing music work, and how painstaking it is to sequence good drum parts for a jammin’ sounding track. I’ve worked with some really good drummers over the years (you know who you are, Mark, Larry, and Pat), and boy do I miss them. On the other hand, I’m not really set up to mic a drum kit in my little project studio, so it might not come out any good anyway.

I could talk about how I am looking into changing my workout routine, mainly by moving it downstairs. The major reason I’ve been working out upstairs all this time is that I have high ceilings in my living room, and do some exercises where I lift weights over my head. I could do it downstairs, but I’d need to do those sets sitting, which means I need to get a bench. Which has led me to rediscover why I hate shopping along with the fact that modern workout equipment is super-expensive and way more complicated than I need. Like hundreds of dollars just for a bench! When I was in high school I had a bench that came with an exercise machine and I bought the whole system for something like $100. It was really simple, just a board covered with vinyl and foam and some legs. Good for dumbbells and situps. Probably worth $20. I gave it to my brother. I wonder if he still has it…

But I’m not going to blog about any of that stuff tonight. Nope, for now the main topic is origami butterflies. I normally don’t do insects, because that branch of origami has evolved into something like speed metal in music, very focused on one particular dimension — developing lots of points. Not to say it isn’t amazing, cuz it is; but it’s not really my thing. But a butterfly seemed like a good subject because it’s more lyrical than your average bug, and I had an idea for an approach. I’ve seen a bunch of really beautiful butterfly designs, notably Michael LaFosse’s, that are great wings but don’t have legs. I’ve seen others that have legs but are a bit to technical, given the subject. Granted some of these models are from the era where any insect at all was pioneering, but hey. So I wanted to something simple and sculptural, but still complex enough to have legs.

I actually came up with the design midway thru last year’s OUSA convention. Every year I seem to come up with one or two new designs, usually manifesting something I’ve been thinking of for a while but hadn’t had the chance to fold yet. I showed it to a bunch of people and the response was great. It’s based on a waterbomb base, with two of the flaps forming the wings and the other two forming the legs. It’s easily doable from a 6″ square, and only the only hard part is 2 closed sinks in a row. The thing I like best about it is it pretty successfully captures the moment of spreading its wings and taking flight.

I’ve been refining the model over time, an last fall I went to the butterfly tent in the American Museum of Natural History. John Montroll had told me that butterflies really only have 4 legs, the front ones are vestigial and you can’t really see them. Shaw ’nuff he was right. Looking at dozens of butterflies, they all looked like they have four legs. So a redesign is in the offing. Ah well.

Still, I’m happy enough with this design that I’m working on full diagrams for it. Every year I try to diagram one model to donate to the OUSA annual collection. I’m not quite done, but I’ll be sure to post it when I’m done. For now, enjoy this pics and the Crease Pattern for the base.

Origami Sunday

Yesterday I taught at a Special Folding Session with the Origami Society at the American Museum of Natural History. I taught my Turtle, and diagrammed the crease pattern just for the occasion. It’s a model I like alot, and it makes good use of my Hexagon Base. I’ve gotten a fair amount of request for diagrams over time, and one of the organizers of the session asked for this model. One reason I never diagrammed or taught it is that shortly after I finished it, Robert Lang’s Origami Design Secrets came out, and his Western Pond Turtle is not unlike mine in appearance. My model, however, uses a very different folding sequence that is both much easier and roughly twice as efficient in its use of paper. Like many of my models from my Elephant to my UFO, it follows a sort of “upside-down-bowl-with legs” approach, with the greater part of model being only a single layer of paper thick, and the bulk of the paper going to form the legs, head and tail, with the rest gathered near the edges and providing strength.

The Museum is such a great, fun place, and it’s a happy circumstance of history that OUSA is based there. My class was pretty small, 8 people, but 3 or 4 were teenage boys and one in particular was really annoying in a mostly funny kind of way. They’re origami geeks, all into debating which model out there is the “hardest”, and asserting “Satoshi rules!” and that sort of thing, plus a lot of, uh, less mature banter. I didn’t know any origami people when I was growing up, but if I did, I’d have probably been like that.

The model went over well, but all those toes took a long time to fold, so I didn’t get to spend as much time as I’d have liked on the sculpting at the end. It’s pretty advanced model, so not everyone could pull it off with enough precision, but most did pretty well. A fair amount of sculpting can’t really be diagrammed anyway, it’s up to the expressiveness of the artist. It was a fun time, and I think I’ll teach one of these sessions again.

Jeannie and the girls came, and Lizzy stayed and folded while I taught, to the delight of the ladies who like to make ornaments and boxes — she made a bunch of that kind of stuff. Jeannie and Michelle took in the museum, and at the end we had a whirlwind tour of the dinosaur lobby and main African hall. Didn’t make it to the whale room, but otherwise a great day.

And, as a bonus, as I was putting together the CP, I came up with an armadillo, using my hexagon base. I had been thinking of a way to fold an armadillo since last summerwhen we were in Florida and they were in the yard of the house, living uder the hot tub. I had a concept that was similar, but using 45 degree symmetry, that I made from a (rectangle) Animal Kingdom map, but when I got home and tried to reproduce it I couldn’t get it to work. Don’t know why I didn’t think of the hex base sooner; it’s perfect for animals with equal-length legs, and toes. So the approach was solid although the first attempt was not prefect. Made a 2nd attempt with refined proportions, head and tail. It’s pretty close, I probably need one more try, mainly to fine-tune the head. So watch this space.

Origami Polyhedra: The Stellated Dodecahedron Part 2

A little while ago I posted some pictures of Stellated Dodecahedra I made in origami. Here the crease patterns for them. You see, in addition to folding origami, I’ve taken an interest in diagramming, and someday I hope to publish a book of my models. But I find diagramming so laborious that I only do one model a year! (Although they do tend to be pretty complex models.) I’ve also been developing crease patterns, which is particularly useful for polyhedra and other complex subjects where there is a lot of prefolding.

I do my diagramming and CP’s in Flash, and I’m not aware of other people doing this. One reason is I use Flash a lot in my day job, so I know it and can work in it quickly. Another is that I can use to make animated diagrams and CP’s. You can see some of them on my main origami page. This is an experimental format which I am refining over time. It had its origin in the Foldinator Project. Foldinator was originally envisioned as a full-on authoring tool for modeling origami and creating printable diagrams. However, to get there is a rather major development effort. So instead I wound up with this little hacker-level tool that I use. I still hope to finish and release Foldinator someday, but I’d need to treat it like a professional software development project and devote something like 6 months to a year of full-time work to it. Ah well, maybe if I’m lucky I can do like Robert Lang and retire young to do origami full-time.

Meanwhile, you can see the various approaches for the Stellated Dodecahedron.

Here is the one made from two squares. As you can see it’s the simplest of the bunch.

Next up is the one folded from a 2:1 rectangle. This one is remarkably efficient in it’s use of paper, to the point where I had to set it into a larger area to have paper to do the joining. It’s also kind of cool because it has a sort of zigzag layout. I plan to publish an animated CP of this one shortly.

Lastly is the “classic” version, from a single square. This is foldable but very difficult. I like the CP a lot because of the way the layout maximizes the root pentagon and underlying square. Vertices of the finishes form touch 3 edges of the paper. This one would be a good for an animated CP as well.

Origami Polyhedra: The Stellated Dodecahedron

As long as I can remember I’ve liked geometry.

I’ve been doing origami polyhedra for quite some time, and you can see some of the ones I’ve designed on my Origami Page. My approach is mainly from single sheet, in contrast the more common modular approach. When I first started, I thought that it was new, largely unexplored territory, and I could do something really interesting. Soon I could see it was a rich area of endeavor, but also very challenging. Around that time I met John Montroll, and he was way ahead of me down this path. In fact he was about to release a book on origami polyhedra, and was working on a second one. This was great for me, because he was eager to have people test his diagrams, and was very generous with his ideas, and I learned a lot from our discussions. On the other hand, he pretty much had the basics covered and then some, like several versions of the platonic solids, and some prisms and Archimedean solids and other shapes. So I had to go a good deal further to get into original territory.

One of my all-time favorite shapes has always been the Stellated Dodecahedron, which is the 3-D analog of the pentagram. (Which, BTW is the 4D analog of the Tetrahedron, but since no one folds 4-D origami, that’s a bit outside the scope of this discussion.) I’ve designed and attempted to fold various versions of this shape over time.

Here is a design from a single square. I actually succeeded in folding one, from a giant (24″) sheet of foil paper. It worked, but I would not call the result great in terms of the level of craft. I tried another from a smaller (14″ or so) piece of thickish (for origami) paper, but never completed it. The problem is that once you get towards the end, there are many flaps of extra paper to deal with, and the model wants to spring apart. This, combined with the limitation of having only two hands, makes it very tricky to close. I may give this design another try, but I’ve been exploring other avenues.

Last summer at the OUSA Annual Convention I was playing around with ideas for this shape again, and it occurred to me to try it from a 2:1 rectangle. It was still a single sheet, but provide more edge relative to the paper’s area, so it ought to reduce the problem of extra flaps of paper to hide. I have a design for a 2:1 icosahedron which is really efficient and easy to fold, and it didn’t take too long to come up with a regular dodecahedron, which is the base for the stellated version. When I went ahead and folded it, it realized it was so efficient that there was not enough paper to make a lock, so I’d need to go back and modify my design be setting it into a slightly larger rectangle. So I tried again. Still making the model close was a bit of a challenge. Doable, but requiring some effort.

Then over Christmas vacation, I finally had some origami time again, and this time I went for a version made from 2 squares, each of which comprise half the finished model. This is much easier to fold because you can reach inside each half as you’re making it, and the leftover flaps of paper become tabs that fit into the opposite half, nicely solving the problem of what to do with the leftover bits. At the end, the two halves lock together tightly and securely. The resulting model is quite attractive, because it’s much easier not to crush it as you’re putting it together. The examples below are made from (2 sheets each of) 6″ foil paper and 8.5″ photocopy paper.

Which brings up the question: Origami purists like to only work for a single square sheet. Which is more of a “cheat”: to use two squares or one rectangle?

Coming Soon: crease patterns for the 3 methods for Stellated Dodecahedra.